Wondering how to install a toilet or are you ready for a DIY project that will truly make a splash in your home? Installing a new toilet may seem daunting, but with the right guidance, it’s a task that homeowners, DIY enthusiasts, and even budding plumbers can tackle with confidence.
By following this step-by-step guide, you’ll learn how to install a toilet efficiently and effectively, transforming your bathroom without the need for a professional.
In this blog post, we’ll walk you through the entire process of installing a toilet. From removing the old one to ensuring your new toilet is securely in place, each step will be broken down into simple, easy-to-follow instructions.
Schedule Service Online
Get a free estimate so you know what you're signing up for
"*" indicates required fields
For Emergency Services Call: 410-255-9300
By the end, you’ll have a functional toilet and the satisfaction of having completed a significant home improvement project on your own.
Why Install a New Toilet?
Installing a new toilet can bring numerous benefits to your home. Modern toilets are designed to be more water-efficient, which can save you money on your water bills. Additionally, new models often come with enhanced features such as better flushing mechanisms and more comfortable designs.
When to Replace Your Old Toilet
Knowing when to replace your old toilet is crucial. Common signs include frequent clogging, constant leaks, cracks in the porcelain, and outdated design. If your toilet is showing any of these symptoms, it might be time for an upgrade.
Preparing for the Installation
Before you start the installation process, make sure you have all the necessary tools and materials. These include the new toilet, a wax ring, toilet bolts, a putty knife, an old towel, a wrench, and a utility knife. Having everything on hand will make the process smoother and more efficient.
Removing the Old Toilet
Here’s how to remove your old toilet. Remember, if there are any concerns it’s best to reach out to a professional like MD Sewer and Plumbing.
Shutting Off the Water Supply
The first step in removing the old toilet is to shut off the water supply. Locate the water supply valve, typically found behind the toilet, and turn it clockwise until it is fully closed. Flush the toilet to drain the remaining water from the tank and bowl.
Disconnecting the Water Supply Line
Once the water is turned off, disconnect the water supply line from the toilet tank. Use a wrench to loosen the nut that connects the supply line to the tank. Be prepared for some water to spill out, so have an old towel handy to soak it up.
Removing the Old Toilet
To remove the old toilet, unscrew the bolts that secure it to the floor. These are usually located at the base of the toilet. Once the bolts are removed, gently rock the toilet back and forth to break the seal, then lift it straight up and out. Place it in a safe location, such as the garage, until you can dispose of it properly.
Preparing the Floor for the New Toilet
With the old toilet removed, you’ll need to clean the area where the new toilet will be installed. Use a putty knife to scrape away any old wax from the flange and floor. Ensure the area is dry and free of debris to prevent leaks.
Inspecting the Flange
Check the condition of the toilet flange, which is the fitting that connects the toilet to the drain pipe. If the flange is damaged or corroded, it will need to be repaired or replaced before proceeding with the installation.
Installing New Bolts
Place new toilet bolts into the flange, ensuring they are aligned with the bolt holes in the base of the new toilet. These bolts and closet bolts will secure the toilet to the floor, so make sure they are positioned correctly and securely.
Installing the Wax Ring
A wax ring creates a watertight seal between the toilet and the drain pipe. Place the new wax ring onto the flange, with the tapered end facing down. Press it firmly into place to ensure a good seal.
Positioning the Toilet Bowl
Carefully lift the new toilet bowl and position it over the flange, aligning the bolt holes with the bolts. Gently lower the bowl onto the wax ring, making sure it is level and centered.
Securing the Bowl
Once the bowl is in place, press down gently to compress the wax ring and create a seal. Hand-tighten the nuts onto the bolts, then use a wrench to tighten them further. Be careful not to overtighten, as this can crack the porcelain.
Attaching the Toilet Tank
With the bowl securely in place, it’s time to attach the toilet tank. Position the tank on the back of the bowl, aligning the bolt holes. Insert the tank bolts through the holes and tighten the nuts from underneath.
Securing the Tank
Tighten the nuts evenly to ensure the tank is level and secure. Be cautious not to overtighten, as this can also crack the porcelain. Once the tank is secure, attach the water supply line to the tank and tighten the nut.
Checking for Leaks
Turn the water supply valve back on and allow the tank to fill. Check for any leaks around the base of the tank and the connection to the water supply line. If you notice any leaks, tighten the connections slightly until they stop.
Choosing and Installing the Toilet Seat
Select a toilet seat that matches the design and color of your new toilet. Most toilets come with a basic seat, but you may want to upgrade to a more comfortable or stylish option.
Attaching the Seat
Position the seat on the toilet bowl, aligning the bolt holes. Insert the bolts through the holes and tighten the nuts from underneath and make sure its sealed using a toilet wax ring.
Make sure the toilet seats are leveled and secure before use.
Final Adjustments
Give the toilet a final check to ensure everything is secure and functioning correctly. Tighten any loose connections and make sure the toilet is level. Once you are satisfied, your new toilet installation is complete!
Maintaining Your New Toilet
To keep your new toilet in top condition, clean it regularly with appropriate cleaning products. Avoid using harsh chemicals that can damage the porcelain and always follow the manufacturer’s cleaning instructions.
Checking for Leaks
Periodically check for leaks around the base of the toilet and the connections to the water supply line. Early detection of leaks can prevent water damage and save you money on repairs.
Professional Inspections
Consider having a professional plumber inspect your toilet and plumbing system annually. A master plumber can identify potential issues early and ensure your toilet remains in optimal condition.
Common Installation Mistakes to Avoid
Here are a few mistakes commonly made by DIY enthusiasts when it comes to toilet installation.
Skipping the Wax Ring
One common mistake is failing to install a new wax ring. The wax ring is essential for creating a watertight seal and preventing leaks. Always use a new wax ring when installing a toilet.
Overtightening Bolts
Overtightening the bolts that secure the toilet to the floor or tank can crack the porcelain. Tighten the bolts just enough to secure the toilet without causing damage.
Ignoring Flange Issues
If the toilet flange is damaged or corroded, it must be repaired or replaced before installing the new toilet. Ignoring flange issues can lead to leaks and an unstable toilet.
Troubleshooting Installation Issues
Here are a few common installation issues people run into during and after the install.
Toilet Wobbles
If your toilet wobbles after installation, it may not be level. Use shims to level the toilet, then tighten the bolts evenly to secure it in place.
Persistent Leaks
Persistent leaks may indicate an issue with the wax ring or flange. Remove the toilet and inspect the wax ring and flange for damage. Replace any damaged components and reinstall the toilet.
Weak Flush
A weak flush can result from a partially closed water supply valve or a clogged drain. Check the water supply valve to ensure it is fully open and inspect the drain for blockages.
![]()
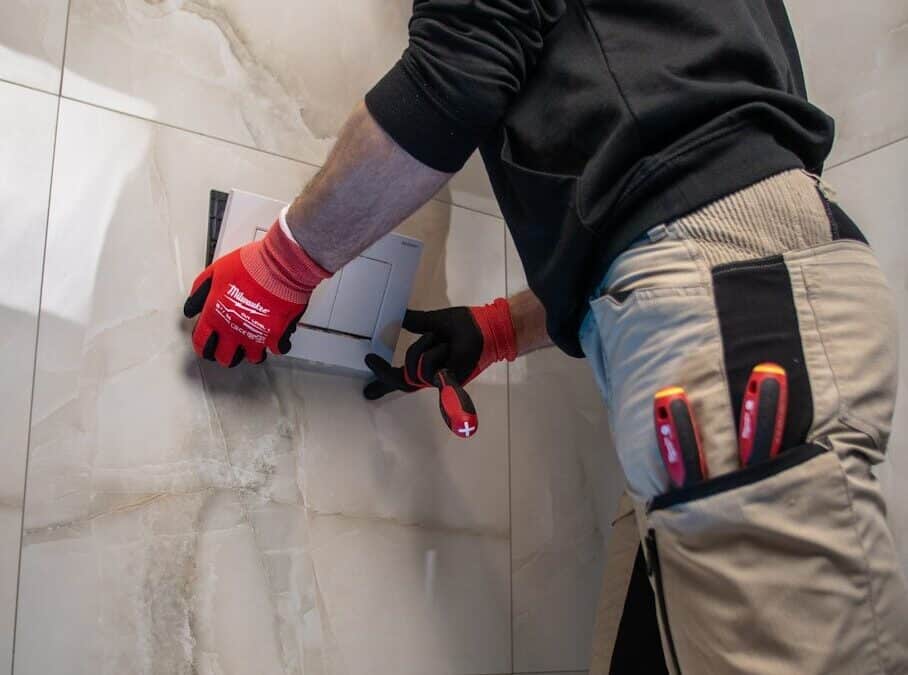
Why You Should Leave It to Professionals like MD Sewer and Plumbing
While installing a new toilet can be a rewarding DIY project, there are several reasons why you might want to consider leaving the job to a professional like MD Sewer and Plumbing. Plumbing projects, even seemingly simple ones, can come with unexpected challenges and complexities.
Expertise and Experience
Professional plumbers have the expertise and experience to handle any issues that may arise during installation. They are well-versed in local plumbing codes and standards, ensuring that your installation is compliant and safe.
Time and Convenience
Hiring a professional saves you time and effort. A skilled plumber can complete the installation quickly and efficiently, allowing you to focus on other important tasks or simply enjoy your day without the stress of a plumbing project.
Quality Assurance
With a professional like MD Sewer and Plumbing, you can be confident that the job will be done correctly the first time. They use high-quality materials and proven techniques to ensure a long-lasting and leak-free installation.
Comprehensive Services
MD Sewer and Plumbing offers a wide range of plumbing services beyond toilet installation. Whether you need a new water heater, drain cleaning, or complex plumbing repairs, they have the skills and tools to handle it all.
Safety and Warranties
Professional plumbers prioritize safety, ensuring that all connections and components are installed securely to prevent leaks and other hazards. Additionally, many professional services offer warranties on their work, giving you peace of mind and protection against future issues.
For your next toilet installation or any other plumbing needs, trust the experts at MD Sewer and Plumbing. Their professionalism, reliability, and commitment to customer satisfaction make them the ideal choice for all your plumbing projects.
Conclusion | How To Install A Toilet
Installing a new toilet may seem like a daunting task, but with the right tools and instructions, it’s a project that can be completed by DIY enthusiasts, homeowners, and aspiring plumbers alike. By following this step-by-step guide, you’ll have a functional and efficient toilet in no time.
Remember, the key to a successful installation is preparation and attention to detail. Take your time, follow each step carefully, and don’t hesitate to seek professional help if needed. With your new toilet installed, you can enjoy the benefits of improved efficiency, reduced water bills, and a refreshed bathroom space.
For more tips and expert advice, be sure to subscribe to our newsletter and join our community of DIY enthusiasts and home improvement experts. Happy installing!