A running toilet at 3 AM. A weak flush that won’t clear the bowl. A mysterious leak pooling around the base. Sound familiar? These toilet problems always seem to strike at the worst possible moments, but the good news is that most toilet issues can be fixed with basic tools and a little know-how.
Before you reach for the phone to call a plumber, take a few minutes to understand how your toilet works and what might be going wrong.. Most toilet repairs are surprisingly straightforward once you know what to look for. This comprehensive guide will walk you through diagnosing and fixing the most common toilet problems, potentially saving you hundreds of dollars in service calls.
From a constantly running tank to a complete toilet replacement, we’ll cover everything you need to know to tackle these repairs with confidence. Let’s start by understanding the basic components that make your toilet function properly.
Schedule Service Online
Get a free estimate so you know what you're signing up for
"*" indicates required fields
For Emergency Services Call: 410-255-9300
Photo by Lori Martin on Unsplash
Understanding Your Toilet’s Anatomy
Before diving into repairs, it’s essential to understand the key components of your toilet system. The toilet tank houses most of the moving parts that control flushing and refilling. The main players include the flush valve (which releases water from the tank into the bowl), the fill valve (which refills the tank after flushing), and the flapper valve (a rubber seal that covers the flush valve).
The toilet handle connects to a chain or lift wire that raises the flapper when you press it. The overflow tube prevents the tank from overflowing by directing excess water into the bowl. A ball float or float cup rises and falls with the water level, signaling the fill valve when to stop filling.
In the bowl area, the toilet flange connects the toilet to the drain pipe in your floor. A wax ring creates a watertight seal between the toilet base and the flange. The supply line brings fresh water from your wall shutoff valve to the fill valve in the tank.
Understanding these components helps you identify where problems originate and which replacement parts you might need from the hardware store.
Fixing a Running Toilet
A toilet that won’t stop running is one of the most common and annoying plumbing problems. The constant sound of running water and the waste of potentially hundreds of gallons per day makes this a priority repair.
Check the Flapper Valve
Start by removing the toilet tank lid and examining the flapper at the bottom of the tank. This rubber seal should sit flat against the flush valve seat. If it’s warped, cracked, or has mineral buildup preventing a proper seal, water will continuously leak from the tank into the bowl.
Clean around the flapper seat with a pumice stone or fine sandpaper to remove mineral deposits. If the flapper itself is damaged, it’s an inexpensive replacement part available at any hardware store. Make sure to match the size and style to your existing flush valve.
Adjust the Chain Length
The chain connecting the flush handle to the flapper needs proper adjustment. Too much slack prevents the flapper from lifting fully during a flush. Too little slack keeps the flapper from seating properly, causing continuous running.
Adjust the chain so there’s about half an inch of slack when the flapper is seated. You can move the chain to different holes in the flapper or adjust where it connects to the flush handle lever.
Replace the Fill Valve
If your toilet continues running after flapper adjustments, the fill valve may be the culprit. Modern fill valves are designed to last 8-10 years, but hard water and mineral buildup can shorten their lifespan.
Turn off the water supply at the wall shutoff valve and flush to empty the tank. Disconnect the supply line and remove the old fill valve by unscrewing the large nut underneath the tank. Install the new valve according to the manufacturer’s instructions, ensuring the proper water level is maintained.
Adjust the Float
Older toilets use a ball float connected to an arm that controls the fill valve. If the water level is too high, gently bend the float arm downward. If the level is too low for proper flushing, bend the arm upward slightly.
For newer toilets with a float cup that slides on the fill valve shaft, pinch the spring clip and adjust the float position to achieve the correct water level, typically about one inch below the tank rim
Resolving Weak Flush Issues
A toilet that doesn’t flush completely or requires multiple flushes wastes water and fails to do its primary job effectively.
Check Water Level
The water level in your tank should be about one inch below the rim or at the marked water line inside the tank. If the level is too low, your toilet won’t have enough water volume for an effective flush.
Adjust the float or fill valve to raise the water level. If you have an older toilet with a tank ball instead of a flapper, ensure it’s seating properly and not preventing the tank from filling completely.
Clean the Rim Jets
Mineral deposits can clog the small holes under the toilet bowl rim, reducing flush power. Use a wire coat hanger or small mirror to locate these jets, then clean them with a pumice stone or muriatic acid (following all safety precautions on the product label).
For stubborn buildup, you can tape the bowl’s trap and fill it with vinegar overnight, allowing the acid to dissolve mineral deposits throughout the flushing system.
Examine the Flush Valve Seat
A warped or damaged flush valve seat prevents proper water flow during flushing. Remove the flapper and inspect the plastic or brass seat for cracks, warping, or severe mineral buildup.
Minor damage can often be sanded smooth, but significant damage requires replacing the entire flush valve assembly, which is a more involved repair that might warrant calling a professional plumber.
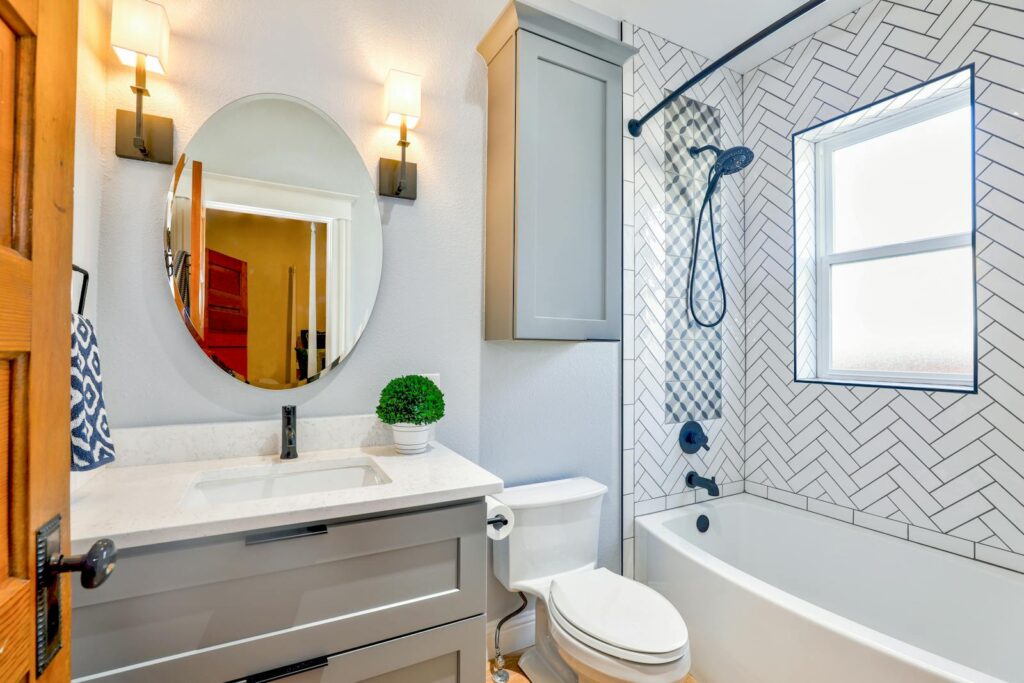
Photo by Christa Grover on Pexels
Stopping Toilet Leaks
Water around the base of your toilet can indicate several different problems, from minor condensation to major structural issues requiring immediate attention.
Identify the Leak Source
First, determine where the water is coming from. Dry the area completely and place food coloring in the tank. If colored water appears around the base, the leak is coming from inside the toilet system. Clear water usually indicates condensation or a supply line problem.
Check all visible connections, including where the supply line meets the fill valve and where the tank bolts connect the tank to the bowl. Tighten loose connections with appropriate wrenches, being careful not to overtighten and crack porcelain components.
Replace the Wax Ring
If water consistently appears around the toilet base, especially after flushing, the wax ring seal between the toilet and floor flange likely needs replacement. This is a more involved repair that requires removing the entire toilet.
Turn off water supply and disconnect the supply line. Remove the nuts from the toilet bolts (usually covered by plastic caps) and carefully lift the toilet straight up. Scrape away the old wax ring from both the toilet base and floor flange.
Install a new wax ring on the flange, ensuring it’s centered properly. Lower the toilet straight down onto the new ring, applying even pressure to compress the wax and create a proper seal. Replace the bolts and reconnect the water supply.
Address Tank-to-Bowl Leaks
Water leaking between the tank and bowl indicates failed gaskets or loose tank bolts. This repair involves removing the tank from the bowl, which requires shutting off water and disconnecting the supply line.
Remove the nuts from the tank bolts inside the tank and lift the tank off the bowl. Replace the large gasket between the tank and bowl, as well as the smaller gaskets around each tank bolt. Reassemble with new hardware if the old bolts show corrosion.
Clearing Clogged Toilets
While not technically a repair, clearing clogs is an essential skill for any homeowner and can prevent more serious drain problems.
Choose the Right Plunger
A standard cup plunger works for sinks and tubs, but toilets require a flange plunger (also called a toilet plunger). The extended rubber flange fits into the toilet trap, creating better suction for clearing blockages.
Ensure there’s enough water in the bowl to cover the plunger head. If not, add water from another source rather than flushing again and risking overflow.
Proper Plunging Technique
Place the plunger firmly over the drain opening, ensuring the flange extends into the trap. Push down slowly to expel air, then pull up sharply to create suction. Repeat this motion vigorously 15-20 times before lifting the plunger to check if the clog has cleared.
For stubborn clogs, try alternating between plunging and using a toilet auger (closet auger). This specialized tool can reach deeper into the drain system to break up blockages that plunging alone cannot clear.
When to Call for Help
If multiple fixtures in your bathroom are backing up simultaneously, the problem likely lies in your main drain line rather than the toilet itself. Similarly, if you hear gurgling sounds from other drains when flushing, or if sewage backs up into the toilet bowl, these indicate serious drainage issues requiring professional attention.
Replacing Toilet Components
Sometimes repair isn’t enough, and replacing major components or the entire toilet becomes necessary.
When to Replace vs. Repair
Consider replacement when repair costs approach 50% of a new toilet’s price, when you’re dealing with multiple simultaneous problems, or when your toilet is over 20 years old and uses excessive water per flush.
Modern toilets use significantly less water than older models while providing equal or better flushing performance. Replacing an old toilet can reduce your water bill substantially while improving bathroom functionality.
Selecting Replacement Parts
Always bring the old part or a clear photo to the hardware store when shopping for replacements. Toilet manufacturers use different sizes and styles, and using the wrong replacement part can create new problems.
For major components like fill valves and flush valves, consider upgrading to higher-quality parts even if they cost slightly more. Better components last longer and often perform more reliably than basic replacements.
Installation Tips
Follow manufacturer’s instructions carefully when installing new components. Use the proper tools for each job—adjustable wrenches for supply line connections, channel-lock pliers for larger nuts, and screwdrivers for handle and chain adjustments.
Take your time during installation and test each repair thoroughly before considering the job complete. Run several flush cycles and check for leaks at all connection points.
Photo by Battlecreek Coffee Roasters on Unsplash
Safety and When to Call a Professional
While most toilet repairs are well within the capabilities of average homeowners, certain situations require professional expertise.
Safety Considerations
Always turn off the water supply before beginning any toilet repair. Wear rubber gloves when working inside the tank or bowl, and ensure adequate ventilation when using chemical cleaners or acids for mineral deposit removal.
Be cautious when lifting toilet tanks or complete toilets, as porcelain is heavy and brittle. Get help for any lifting that feels beyond your physical capabilities.
Professional Help Indicators
Call a plumber if you discover cracked porcelain anywhere on the toilet, if multiple attempts at repair haven’t solved the problem, or if you’re uncomfortable with any aspect of the repair process.
Additionally, if your toilet problems coincide with issues in other bathroom fixtures, or if you notice sewage odors or backups, these indicate larger plumbing system problems requiring professional diagnosis and repair.
Professional plumbers also have specialized tools for diagnosing hidden problems and can often complete repairs more quickly than DIY approaches, potentially saving money in the long run despite the service cost.
Preventive Maintenance for Long-Term Reliability
Regular maintenance prevents many toilet problems and extends the life of your toilet components.
Monthly Checks
Once monthly, remove the tank lid and visually inspect all components. Look for signs of wear on the flapper, check that the chain has proper adjustment, and ensure the water level is appropriate.
Clean around the rim jets and check for mineral buildup that could affect flushing performance. Address small issues immediately rather than waiting for them to become major problems.
Annual Maintenance
Replace the flapper annually or whenever you notice it’s becoming stiff or warped. Consider replacing the fill valve every 8-10 years as preventive maintenance, especially in areas with hard water.
Check the tightness of all bolts and connections annually, and clean mineral deposits from all surfaces where they accumulate.
7 Products and Brands for Fixing a Clogged Toilet
Here are some top-rated, safe, and effective products that can help with minor toilet clogs:
A trusted name in plumbing, this gel formula is tough on clogs while being safe for most toilet systems. It quickly dissolves organic material to restore flow.
Green Gobbler Drain Clog Dissolver
Eco-friendly and effective, this product uses natural enzymes to break down clogs without harsh chemicals, making it a safer option for home use.
Plumbcraft Toilet Plunger with Handle
This simple yet essential tool is designed specifically for toilets. Its ergonomic handle and powerful suction make clearing minor clogs easy.
Perfect for tougher clogs, this manual auger allows you to reach deeper into toilet pipes to clear blockages without damaging the plumbing.
Liquid-Plumr Hair Clog Eliminator
Though it works wonders on hair clogs, this product can also dissolve other organic debris in toilets and drains safely and effectively.
Flush N Sparkle Septic-Safe Cleaner
Designed for regular maintenance, this cleaner helps prevent future clogs and ensures your toilet stays fresh without harming the septic system.
Combining functionality and design, this durable toilet plunger comes with a drip-free storage case and is ideal for safely dislodging minor clogs.
Each of these products is easy to use and specifically crafted to address toilet clogs while keeping your home’s plumbing system intact. Always follow the manufacturer’s instructions for best results.
MD Sewer and Plumbing is here for all of your toilet and plumbing issues. Contact us today!
Take Control of Your Toilet Repairs
Most toilet problems stem from a few common issues with straightforward solutions. With basic tools and the knowledge provided in this guide, you can handle the majority of toilet repairs without professional help, saving both money and the frustration of waiting for service calls.
Remember that taking action quickly when problems first appear prevents minor issues from becoming major repairs. Keep basic replacement parts like flappers and fill valves on hand, and don’t hesitate to tackle simple repairs as soon as you notice them.
However, know your limits and call for professional help when repairs exceed your comfort level or when multiple problems suggest larger system issues. The key is building confidence through successful small repairs while recognizing when expert help provides better value and safety.
For complex plumbing issues or when DIY repairs don’t solve the problem, consider reaching out to experienced professionals who can diagnose and fix issues quickly and effectively.